A Week of Hearts

 These are Sally Hansen Salon Salon Effects Nail Polish Strips in "Speed Dating."  These first two pictures were taken the morning after I applied them.
 The hearts have a cool gradient effect with red and orange.  It's subtle, but nice.  I was pleased with my fit and application.  I've picked up a few tricks having done these several times now!  :)
 This is the first time I have not used any top coat during the process of wearing these stickers.  Here, above and below, are the gratuitous pictures taken this morning, on the beginning of day seven!  I did buff them quickly with the Revlon Crazy Shine buffer, just to perk them up.
I have some tip wear, yes, some out-growth, yes, but they are still looking gosh darn good, I'd say!  While I have so many fantastical polishes I'm eager to wear, I will confess that it's been sweet not changing my polish at all this week.  What a nice break!  I plan on wearing these strips in the beginning of March when I take a week long trip to visit my grandparents.  Then I won't have to worry about packing polish and that sort of thing.  :)

» Read More...

My Funfetti Mani

 This mani took more time and patience than most do, however, I am well pleased with the results!
 I used three coats of Essie Marshmallow for my underwear.
 Next, I added one and a half coats of Lynnderella Sweets to the Sweet.  I say one and a half because several nails only need one coat but some others I dabbed on a bit more (up to two coats of it in total).
 I finished everything with two coats of Gelous and then a coat of Seche Vite.
 It was not perfectly glassy smooth, but still smooth enough for me to enjoy.  I actually did a close variation of this combo right before this mani and I had trouble that time around with the white glitters in Sweets to the Sweet bunching up on each other and in little heaps.  I would say that this polish requires more patience and skill in application than many glitters...but then again, this is so delightfully delicious that I am more than happy to put up with some glitter shenanigans!
It looks like tasty funfetti cupcakes and I definitely had a few friends telling me that they wanted to lick my nails!  :)

» Read More...

Super Fun Neon Salmon Dots and Things

 This is what I'm currently wearing:  Zoya Ali with Lynnderella Connect the Dots.
 I used two coats of each polish and then followed it with Gelous and Seche Vite.
 I have to apologize because these pictures are terribly color inaccurate!  Ali is a tricky beast.  She is more pink than what it appears here, although not a true straight-up neon pink.  I'd call her neon salmon pink.  Almost coral, but not quite.
 The polish actuals appears more like what you see in the bottle above, in real life.
 I love this picture above (and below!) for showing more of the magnificent micro shimmer that is in the otherwise clear base of Connect the Dots.
 Yesterday at work, a more mature woman surprised me by telling me that she liked my nails.  :)
Heck yeah!  I love this.  I kind of have to restrain myself from wanting to use Connect the Dots over everything.  It's that good.

» Read More...

Me, Wearing a Sheer?!

 You've probably never seen this here before...
 a sheer polish with VNL!
 I don't even know what possessed me.  This is three coats of the new Revlon ColorStay Calla Lily by itself.
 Then I added two coats of Lynnderella's Snow Angel.
 The light is very warm here, but also I feel self-conscious that my nails look stained.
 I do like how it's sort of fresh, clean, and lacy looking.
 Here are pictures indoors, where the light is cooler.
Sadly, this mani did not last long at all (we're talking a few hours) and I totally blame the Revlon ColorStay base coat because that's about the only suspect thing that I used.

» Read More...

Niiiiiiice!

 This blessed manicure wore for three wonderful days!
 I used two coats of a-england Galahad and then two coats of Lynnderella Connect the Dots.
 I think I had a some tiny bubbles, but honestly I didn't even care because they blended in with the delicate shimmer particles.
 I really adore how this turned out.
 I know I stole the base color idea from a friend on the nail board (I can't remember exactly who, so speak up if it's you!).  I saw it a long time ago and it stuck out in my head as awesome.
 Also, I've been wanting to use this Lynnderella polish for some time now but was feeling unsure of exactly what to put under it.  I think probably everything would look good under it, but I wanted it to be nothing short of spectacular.
 Here's how my right hand turned out.  I think I may like it a little better, but both looked great really.  Check out the black glitter over the white glitter on my middle finger!  That's my favorite part.  :)
If you haven't heard of Lynnderella polishes, you can check out her blog here.

» Read More...

More Party Tox

 These are some SKINFOOD Party Tox swatches I did a few weeks ago.  The bottle above is No. 7 Pearl Party and it corresponds with my index finger.  I used one coat of the glitter over a coat of black polish (DC Matte Black) for all of these.  I also used top coat so that they would look good and shiny.  :)
 The bottle above is No. 8 Aqua Party and it goes with my middle finger.
 The bottle above is No. 9 Deep Sea Party, and you guessed it, it corresponds with my ring finger.
Last is No. 5 Seaweed Party and it's on my pinky nail.  I think it looks really cool over the black.

I ordered these off of Ebay.  I'm a little flustered because I think I may have No. 6 Coral Party in my possession, but I'm actually not positive.  This is the downside to having a huge stash and not having any spreadsheet or easy method of organization.  If I find it, I'll have to swatch it!  But then again, maybe I didn't even buy it.

» Read More...

Bumpy Feathers

I have had a tumultuous relationship thus far with Glitter Gal's Light as a Feather polish.


After two failed attempts to use it the other day (results were no bueno), I decided to give it another go today. I started with Seche Vite top coat (I've heard that this makes a good Aqua Base substitute) and then did three coats, waiting around five minutes or more between coats.


It's better! But I have lots of bubbles. :( Bubbles are unacceptable, Nation. I cannot live with bubbles. Oh, and the picture above is my favorite.


I've since added a coat of Gelous over top, at the advice of the awesome women of MUA (Nail Board, of course). This seems to have helped a tiny bit, and thankfully, does not appear to have dulled the holo whatsoever.


The picture below is included to show you the truth of the bubble situation. It is not for the faint of heart. Look away if you must!!


I'm thinking that I may need to put some China Glaze Shooting Stars over it all.


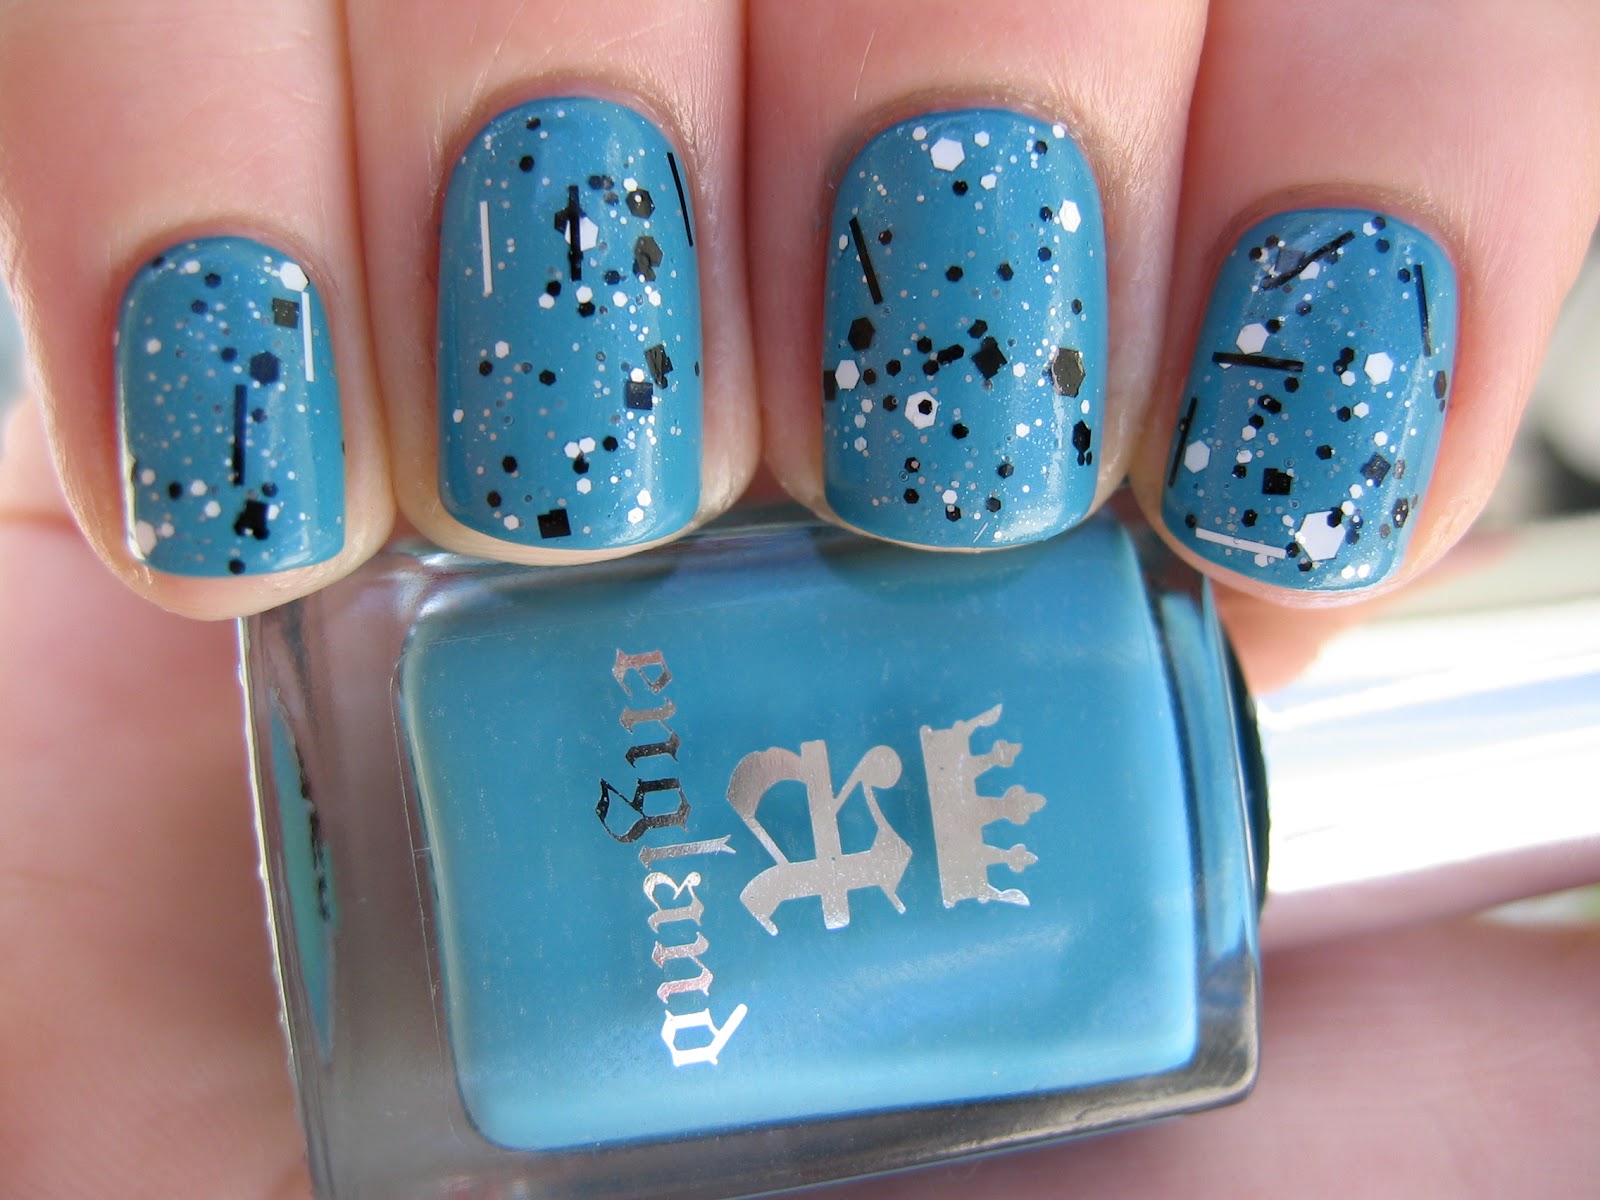
Update! I have since added KleanColor My Valentine. See what you think.


I actually really like how it turned out!


I know it takes away from the subtleness of the holo, but I just couldn't live with the bumpiness.


And I love the colors of the glitters together. :)


You can still see the holo peeking through a little.


What do you think? Will you forgive me for my glittery sins?


EDIT: Afterthoughts. This mani hardly made it past the 12 hour mark! I'm wondering if it's the SV as a base coat that is to blame. It just peeled off in sheets, like plastic stickers. :( Oh well! You win some, YOU LOSE SOME.

» Read More...

Fourth of Tape, I Mean, JULY, Mani!

I hope you all have a wonderful and safe 4th of July! Here's my first ever tape mani.

I started with three coats of Illamasqua Scorch.

The red is L.A. Girl Glitter Addict Animate and the blue is L.A. Girl Glitter Addict Jostle.

I'm sure most of you know how to do tape manis as they are super popular (and awesome) and all over the nail blogosphere now.

Here is how I did it, in case you are curious. I started with three coats of Scorch and then topped it with Poshe. I let it dry pretty well, for several hours. Then, I used scotch tape to mark off on one nail everything except for the part I wanted to be red. I painted it red, careful not to get polish on my skin, and kind of encouraged the glitter pieces to spread out as evenly as I could with the brush. After that, I pulled the piece of tape off, rather swiftly.

I finished all the red parts, going one nail at a time and being careful not to smudge the red glittered areas after. I tried taking some of the stickiness off the tape by sticking it to my palm first, but I found that I actually preferred the tape to be quite sticky. I didn't have any problems because the base polish was completely dry and with it stickier I could keep it on the edge near my cuticle better (so none of the polish I was painting on would pool under the tape).

I let it dry well and actually waited until the next morning to finish. I didn't want to add more top coat yet and I couldn't risk the tape disturbing the red glittered areas.

Then I put a piece of tape down past the line of the red (to create a white stripe), and painted the blue glitter on, one nail at a time. Rip the tape off, continue until done. Follow with top coat and it's finished!

I had other grand ideas involving stars and things, but for the most part I really like how this turned out. It definitely involved more care and planning than I'm used to, but I can see myself doing more tape manis in the future.

Have you tried doing a tape mani yet? If so, what did you think?

Also, if you have any great tips or secrets for me, please share! :)

There's always room for improvement.

Thanks for stopping by!

» Read More...

Popular Posts